As a user, why do maintenance yourself?
A considerable number of tape deck problems in general can be traced back to poor maintenance and in particular by a lack of a clean tape transport path. Meaning all elements of the tape deck where the tape should run or slide along.
Yes, the tape should slide without any friction and this won’t be possible with dirty tape guides, rollers or tape heads.

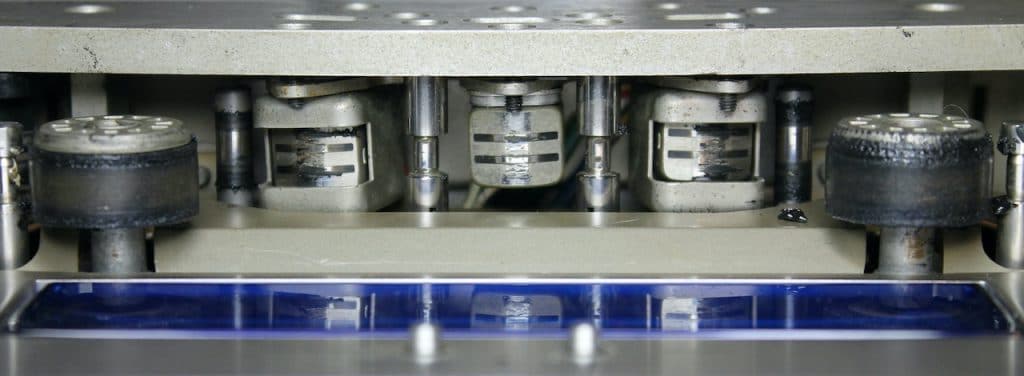
Tape guides: are there to obviously guide and align the tape along the heads and avoiding the tape to deviate across the heads. Tape guides get dirty mainly by tape oxide residues. This build-up of tape oxide on tape guides is very much related to the age and type of tape, but also how the tape was stored. Even stored in optimal conditions there can be significant differences in degradation of tapes formulas from the 60’s to 90’s. The different tape degradation phenomena should cover a separate chapter. To be continued….
Dirty tape guides cause friction thus resistance to a fluid tape transport. This resistance can become so bad that even the reel and capstan motors are no longer able to move the tape forward and even come to a stand still!
If you experience this or if the tape speed slows down during playback, then stop the tape deck immediately to avoid overload conditions of the motors, more in particular the capstan motor which can be the weakest link in the chain for some tape deck models.
Tape heads: the record head converts the amplified audio signal into a magnetic field at the nearly invisible gap of the head. This magnetic field is registered by the moving tape along the head. The playback head is doing the opposite. A perfect tape contact with the head gap is therefore crucial. Due to tape or other residues on the heads the tape is, as it were, lifted off the contact area of the tape head. During recording and playback, this will lead to an unstable audio signal whereby the high tones will disappear first and sound like muffled audio.
What are do’s and don’ts for tape deck maintenance?
Which solvents to clean the tape path?
In the tape deck production era also cleaning kits were available from the manufacturer, mostly containing a small bottle of cleaning agent. The type of agent varied but often they were toxic and harmful to health. In the 70’s and 80’s the safety standards were not what we’re used to now!
What can be used as todays cleaning agents?
- Denatured alcohol: this is ethanol (ethyl alcohol) made unsuitable for human consumption by adding e.g. bad tasting additives.
- Isopropanol: this is a secondary alcohol often used to degrease lenses or cleaning of printed circuits boards. It is also useful for cleaning tape heads and guides, but hardened tape deposits will release easier with denatured alcohol.
- In case the above are not able to get rid of all deposits: aceton. But be very careful in the use of this product! Read and follow the Material Data Sheet or label on the bottle. Aceton is harmful to health and environment, but will also damage or even melt certain plastics (VU meter panels!) and dissolve rubber (pinch rollers!), paint and prints on front panels.
Be very careful when applying aceton!
What should NOT be used to clean tape heads?
- Abrasive liquid or solid products.
- Abrasive, rotating or sharp metal tools
- Metal polish, polish compounds
How to clean?
Use a cotton swab and moisture it with cleaning agent. Wipe firmly over the tape heads and guides.
Warning: do not wipe across (up/down) the tape heads, only in the direction of tape transport (left/right)
Repeat as much as necessary with a fresh cotton swab until the tape heads and guides are 100% clean. Use magnifier glasses to verify. Do not insert dirty cotton swabs into the cleaning agent.


